Future teacher, lifelong learner

Category: EdTech (Page 1 of 2)

Here’s why language teachers should use Youtube

I’ve talked a lot about using Youtube in the classroom, but I wanted to know what experts have to say. I did some preliminary research, and while there didn’t seem to be a lot out there, I was able to find some good sources. Here are a few themes that I kept seeing:

Immersion 

Jon Watkins and Michael Wilson did some research on ESL instruction in Japan, and they stated that Youtube was the best way to immerse students in their second language without actually travelling to a foreign country. While travel is amazing, it can be inconvenient and very expensive, not to mention nerve-wracking if you don’t really speak the language still. James York, another researcher in Japan, said it can even help language learners to read body language and non-verbal cues. These things are steeped in cultural norms, yet they can be so important for understanding.

Cognition

We all know that “learning styles” are a myth which have been debunked, and although they were actually mentioned in some of the articles I read, it’s still valuable to learn through two modes at once rather than just one. York states that watching videos can help students to visualize word meanings and remember them better.

Motivation

Watkins and Wilson talked about the term “learner autonomy.” It refers to the idea that students should take charge of their own learning. They note that with Youtube, learners have a wide variety of choice in terms of what video content they’re interested in watching. They can watch at home on their own time. York adds that students probably already watch Youtube sometimes in their free time, and therefore have positive associations with Youtube. It’s already something that they enjoy, so bringing it into the classroom will be more engaging and motivating than opening up a textbook. The content is fresh, new, and relevant.

Overall, these are just 3 good reasons to use Youtube videos in the language classroom. It’s backed up by experts, and it’s a valuable resource that shouldn’t be discredited.

Works Cited:

Watkins, J., & Wilkins, M. (2011). Using YouTube in the EFL Classroom. Language Education in Asia, 2(1), 113–119. doi: 10.5746/leia/11/v2/i1/a09/watkins_wilkins

York, J. (2011). Reasons for using YouTube in the language classroom including practical usage examples. Jaltcalljournal7(2), 207–215. Retrieved from https://journal.jaltcall.org/storage/articles/JALTCALL 7-2-207.pdf

Extra English – video in the ELL classroom

I was at Vic High on Wednesday, and I went to the same ELL class that I go to every Wednesday afternoon. It’s a ton of fun – there’s lots of diversity in the room, different grade levels, different skill levels, and students from all over the world. Naturally, this can also lead to some challenges for teachers, but the ELL instructor is experienced and confident. She uses the TPRS style, which keeps students highly engaged and helps them participate in simple, short conversations. She sometimes uses video in her teaching. However, I also wanted to point out how the TOC used video this past Wednesday.

He showed the students a two-part episode from a series called Extra English. It was set in England, and it looked to be produced in the late 90s or early 2000s. Sure, the accent was different, but he mentioned it to the students and I think that could be a good way of helping them adjust to the varied ways people speak English. The strongest part of this clip was that it addressed youth culture. The characters were roommates who used the Internet and tried to get dates. One character was an immigrant from Argentina and didn’t know very much English yet. Sometimes, he misunderstood things, which led to funny situations. It was actually a lot like a sitcom, except that the actors spoke more slowly and clearly. The TOC also addressed this and asked the class if they heard people usually speaking this slowly. I liked that the slow speech made the content more accessible for students, and it was also great for them to recognize the differences between the show and the native speakers they hear every day.

I’m glad he used this resource because now I’ve made a note of it and I potentially might use it in the future. It was the right level of language, and it’s a type of content that’s relevant and interesting to high school students. Furthermore, it was about 20 minutes long, which is awesome for a TOC who probably doesn’t have a lesson plan. It wasn’t just to fill time, because he asked a few questions afterwards and had students write 5 sentences about the TV show.

This is just another great example of video being used in the language classroom.


A completely amateur seamstress repaired a vintage fur coat – the results will SHOCK you!

Last winter, I trudged mournfully through the snow and the biting wind, wearing the same American Eagle parka every day because it was my only warm coat. Underneath it I had to wear two shirts and a sweater, but I was still freezing my butt off. This winter won’t be like that because I bought a vintage fur coat off Craiglist for $100! It’s from the 1960s or 70s, and it’s made of raccoon.

Here’s the problem: after I took it home I realized there was about a 1.5-inch tear under one of the arms. I wasn’t super freaked out about this because the same thing happened to my mink coat (another vintage piece, from the 1950s). Last time, I was on the mainland and my grandma fixed it for me. I was too scared to try, in case I made a mistake.

This time though, it was up to me to fix it. I’ve been getting more confident with my hand sewing skills, since my machine is still on the blitz. So I gathered some materials.

I chose to use some dark brown embroidery thread: first of all, because it’s thicker and stronger, and second of all, in case any of the thread would show through on the front side. I did split the embroidery thread into two strands though, so that it wouldn’t be super thick.

Here is what the rip looked like. You can see it’s quite long, and vintage fur can become delicate over time. I was worried that it would rip even further.

First, in order to get to the back side of the rip, I had to seam-rip the lining. Now, I could actually open up the coat and sort of turn it inside out so that I had access to the rip.

Here’s what it looked like once I opened it all up. You can see that the rip is right up against the black strip of reinforcement which connects the arm hole to the rest of the coat.

I ended up doing a whip stitch (like my grandma told me to) horizontally across the rip. My needle had to penetrate both sides of the fur, as well as the black reinforcement. That’s a lot of thick layers to sew through, so I needed to use a very old-fashioned tool…

A thimble!!

This saved my finger from literally getting stabbed every single time I needed to push the needle through the material.

In the end, here’s what the seam looked like from the inside. Both sides are tightly stitched together and won’t be able to tear further down.

Here’s a before-after comparison. You can still see the seam a little bit from the outside, but luckily the long hairs cover it up (and it’s underneath the armpit anyway). Obviously, I am not an accomplished furrier!

To finish it off, all I needed to do was re-attach the lining to the black piping at the bottom hem of the coat. It was a really long hem, but I just did a quick whip stitch. This whole process of fixing the coat, from start to finish, took me about 45 minutes.

Overall, I think it would have cost me almost as much as I spent on the coat in the first place in order to get someone to fix it. It also would have been hard to find a furrier, because the fur industry is kind of dying. In a sense, it makes me feel even happier to have the coat because it feels like a relic of a bygone era. It’s very satisfying to take something old and broken and give it life again. I probably said the same things when I wrote about mending that wool sweater, but it just feels wholesome when you take the time to fix things. Now, when I wear this coat in the winter, I can feel proud that I played a role in its journey.

Youtube for learning

This morning, I was doing some more research on my EdTech inquiry project. I wanted to know how teachers are already using Youtube in schools. Well, I came across a section of Youtube that I’d never seen before! I guess to most people this is old news, but did you know Youtube has a section just for education? Here’s what it looks like:

Scrolling down further, I found sections about fear and psychology:

I love that Youtube is highlighting creators who make educational content and separating it out from other content. The article I read said that they specifically tried to filter educational content from distracting videos and potentially offensive content. They also turned off the recommended section so that students won’t just keep clicking and accidentally watch for longer than they intended. I’m sure everyone has had that experience where they’ve gone down a rabbithole and just kept watching entertaining videos for like an hour (or more)…

Another article talks about how students use Youtube on their own time. A survey conducted with German students found that 50% of them watch educational content, including concepts they were stuck on, information they needed to review, and tutorials such as music, art, and drama lessons. I just think it’s so awesome that students who are really curious can learn basically anything they want to know in about 15 minutes on Youtube. If students are already using these resources, then it’s so important for teachers to take advantage of that. Maybe we can curate playlists of suggested content, such as specific math concepts that they can look at if they get stuck while doing homework. For an English or French class, a teacher could ask students to watch a video at home for homework, and then discuss it the next day in class.

The content on Youtube is infinite, so the possibilities are endless!

Mending: a forgotten skill

I have literally never felt like such a domestic goddess before.

I went to work. I came home. Did all the dishes. Did some homework. And then I finally got around to a task I’d been meaning to work on for two weeks: mending! I actually fixed something that was broken! It’s so satisfying. Everyone should know how to mend.

First of all, here are the materials I used:

Scissors to cut the thread, a needle, a seam-ripper, and somehow I randomly had the EXACT same colour thread as the sweater. So that was unexpectedly cool.

Here’s what I had to work with:

It’s not my usual colour, but it was $5 for 100% lambswool. Made in Scotland. How could I resist?

The sleeves, however, were not looking so hot. Do moths actually eat wool or is that a thing of the past? Because it looks like moths have been munching on this sweater…

Sleeve #1 may not look too bad at first glance. It only has a couple tiny holes. Until you notice that its previous owner had done quite an awful mending job with a mismatched bright green thread. They didn’t do an invisible stitch either, so the thread is clearly visible. Luckily my grandma taught me how to do an invisible stitch when I was a kid, so I remember how to do it. Sleeve #2 is obviously in pretty bad shape too.

I started by twisting the thread around my finger a few times and then rolling it off with my finger and thumb to make a knot. Not sure if that makes any sense at all, but it’s basically a way easier method than squinting and trying to tie a teeny tiny knot. I started from the inside of the sleeve so that my knot, and any thread tail, would be hidden. Then, I did an invisible ladder stitch. I found a tutorial on Youtube that shows you how to do it.

I did this stitch on both sides of the holes and tightened the stitches, bringing both sides of the fabric close together and successfully closing up the hole. Let’s see how it turned out.

Now, sleeve #1 looks much better. My stitching is hidden, but even if a tiny bit of it shows, it’s a matching colour! Sleeve #2 looks a tiny bit wonky because the hole I had to close up was very large. Now there’s a slight gather that appeared when I pulled the two sides of fabric closer together. That’s okay. It’s better than having a big hole in the sleeve!

Tonight I transformed something worn-out into something wearable. I think that’s a win for sustainability and slow fashion! Now I just have to wash it. I was too scared before in case the holes would get even bigger, but this sweater smells like old lady perfume. Don’t worry, I won’t put it in the dryer!!

Thrifting 101

I haven’t bought any brand-new clothing since the summer because I took the Secondhand September challenge. Since then, I’ve learned a few things about thrifting and developed some strategies to be successful. I wanted to share them in a post in order to make thrift shopping more accessible for everyone! (Also, I’m taking a break before I get back to studying and writing papers).

Tip #1: Go to the right thrift store!

If you’re new to thrifting, you should check out several different stores in your area, but not all thrift shops are equal. I have a few personal favourites. The closest one to my house is the Salvation Army at Cedar Hill Cross. Not only is its location ideal, but they have regular sales (every other Friday, they have some kind of 50% off deal). On regular days, you could spend $10 on a sweater or top, but I prefer to get them for $5 of course! Even more awesome is the fact that there is no sales tax – Salvation Army is a non-profit organization. When you buy from them, the money goes right back into the community to feed, clothe, and shelter people who are in need. Another great organization is Women in Need, or WIN, which is located downtown on Pandora Avenue. They specifically support women in the community. You can often find great brands downtown as well!

I used to go to Value Village quite often when I lived in Abbotsford, but I find that the one in Victoria can be quite overpriced. Tops can be $12-20 depending on the brand, and they rarely have good sales. They are a for-profit organization so naturally they charge more; plus you’ll be paying sales tax.

Tip #2: Look in all the sections. 

I don’t mean literally all the sections. But say you’re usually a size small in tops. Go through all the sizes! Items that end up in the thrift store are often marked incorrectly, put back on the wrong rack, or you can just go for the oversized look which is so popular right now. If you’re a larger size, don’t be afraid to skim through all the racks because things can definitely be misplaced. Another place you can look is the men’s section. I find so many soft cotton flannels – some that I bought for my husband, and one or two that I kept for myself! To be honest, these tips kind of only apply to tops, because so far I have been shockingly unsuccessful at thrifting pants. I wear an uncommon size and so far haven’t had any luck finding it. However, I have heard that you can sometimes find vintage Levi’s in the men’s section, so if they fit you, definitely give that a try!

Tip #3: Look for natural fibres. 

I never used to care what my clothes were made of; only how they looked. But last winter I pretty much froze my butt off every single morning when I walked to the bus stop in -10 weather at 6 AM. That made me realize that polyester and acrylic simply aren’t warmenough for winter! I have had amazing luck thrifting outerwear – most notably, a coat made in Italy that’s 80% wool, and another one made in Poland that is 55% wool. Both of these will be so much warmer than the one I got off the sale rack at Guess. And, they were both right around $12 (I love those 50% off sales). More recently, I picked up a 100% lambswool sweater made in Scotland, a 100% silk blouse ($3.50), and a black turtleneck with a nylon/polyester/merino blend. It doesn’t have to be 100% natural to be good. Even if you have some wool content, it will keep you MUCH warmer than synthetic fibres. Also, this is stuff that I’d never be able to afford brand-new. A wool sweater would be over $100 and a silk shirt would be at least $50!

Tip #4: Check the items REALLY carefully (and don’t be afraid to ask for a discount). 

I’m guilty of not following the first part of this rule. When it’s the sale day, I don’t care that much if the item isn’t perfect, because I can get out tiny stains or stitch up tiny holes. But if it’s a full-price item, then I’ll ask for a discount. They’ve been really good about that at Salvation Army – I got some black leather ankle boots that were scratched, and they gave me about 30% off (originally $15 down to $10). Definitely inspect as carefully as possible, especially if you aren’t willing or able to fix the item. If the jeans have a big rip in the crotch or the white shirt has gross pit stains, it’s better for that item to just get recycled. (That’s what thrift stores do with the clothing they can’t sell).

Tip #5: Get out of your comfort zone. 

The best thing about thrifting is that you can find totally unique items that no one else has. You can put those items together in all sorts of creative ways. Sure, some of those items are butt-ugly, but that’s why you have to go on a treasure hunt. Try on some stuff that you’ve never tried before and see if it looks good on you! Maybe you would have never considered buying an item at full price, but then you try it on and end up loving it. Skim the racks with your eyes and see what jumps out at you: prints, patterns, fabrics, details… this is an opportunity to develop your personal style.

Those are my top 5 tips, but above all, make sure to leave yourself enough time so that you can be relaxed, try stuff on, and most importantly have fun! Thrifting is a good habit for so many reasons. You can minimize your carbon footprint while saving money and finding unique items all at the same time! I highly recommend thrift shopping and I hope these tips were helpful! If you have any questions, leave them in the comments section.

Finally finished my giant yellow scarf!

I’ve been pretty swamped with homework and assignments since last week, which is why I haven’t posted here in awhile. However, I procrastinated by knitting for a few hours on Saturday because I was almost finished my scarf! I finally completed it after finishing my 6th ball of yarn. This scarf cost me about $35 in materials, and it is made from nearly 600 metres of yarn. I was getting really nervous while casting off because I ALMOST didn’t have enough yarn left. I ended up with only about two inches extra!

Anyways, I have to go back to writing a paper, but I’m happy that I managed to create something cozy, warm, and functional.

Reclaiming “women’s work”

Knitting, sewing, mending, weaving, embroidery, crochet… Not so very long ago, and in fact for most of human history in most cultures, these tasks were considered essential skills for women. And while the modern woman has by and large rejected the necessity of these skills, they’re still considered thoroughly feminine. Don’t believe me? Well, how many male knitters do you know?

Old Fashioned Singer Sewing Machine

Here we are in 2019, and the average woman doesn’t knit or sew – instead she works full-time. The modern woman no longer has time for domestic arts. For better or for worse, this is largely due to the feminist movement, as well as mass industrialization which allows us to buy goods for a cheap price. But these skills are starting to become popular again, for good reason! As I’ve previously written about, consumers are beginning to reject fast fashion. There’s a shift towards more ethical, eco-friendly production, and what better than to make something yourself at home! Thus, history repeats itself.

In this 1990 article from the New York Times archive, author Deborah Hofmann attributes the decline of home sewing to the cancellation of high school sewing classes, as well as the growing feminist movement. However, some of the home seamstresses she interviewed clearly view sewing as a skill that is in no way opposed to feminism. One woman, simply referred to as Ms. Norville, said, “What has happened in the 90s is that professional women are fed up with being told what they can and can’t do.” In my opinion, this shows that feminism has settled into a comfortable balance. Let me explain. The feminist movement developed as a reaction to restrictive social norms and discriminatory laws. This necessitated a rejection of a quiet domestic life – therefore, domestic tasks such as sewing and knitting were looked upon with deep disdain. As time went on, women’s status was elevated, and the initial passionate rejection of traditional roles started to settle into a comfortable balance – respecting the decisions of the single, childless career woman, the stay-at-home mother of four, and everything else in between!

I think the idea of reclaiming women’s work should be discussed openly, and with nuance. Performing domestic tasks such as knitting or sewing does not automatically transform me into a 1950s housewife. Instead, these are simply hobbies that I enjoy – they shouldn’t be looked down upon, just like we don’t disdain men who enjoy fixing cars or woodworking. Moreover, some craftswomen take these ideas even further and incorporate activism and politics into the things they create. I’m not sure where my free inquiry will take me, but I do believe that developing these skills will make me a more well-rounded person overall!

(For further reading, here’s another article I found interesting while I was researching this subject.)

Exploring Youtube in French


Well, it’s Sunday morning, and I’m sick at home for like the third day in a row. My husband and I both caught the same awful cold and now we’re in the phase which involves hacking our lungs out, so it’s better to stay home rather than infecting the general population. With all this extra time, I’ve been looking into my tech inquiry. I’m really interested in using video, more specifically Youtube, in bringing authentic speech into the language classroom. As recently as ten years ago, we simply didn’t have the massive linguistic resources on the Internet that we have today. Youtube was in its infancy. But now, we can learn basically anything on Youtube.

First of all, here’s a video from Audrey D., a young Québécoise content creator.  I love how she takes expressions that would commonly be heard in high schools, on TV, and things that she would normally say in daily life. That’s exactly the kind of language I want my students to learn! Moreover, I think this is the kind of content that students would be interested in learning. They’ll be able to express their emotions, vent their frustrations, and use slang just like the average francophone teenager.

There are a few limitations to using this kind of video in class; namely, she doesn’t write her own French subtitles and the auto-generated ones are inaccurate, and also, she doesn’t provide English translations for these expressions. I don’t understand all of them, and it’s hard to find accurate translations for slang because most dictionaries and translators focus more on formal, “correct” language.

Here are some of the expressions that she says during the video (in both Quebec informal language and French informal language):

  • Guess what? I have a date tonight!
  • Hey guys, party at our place tonight.
  • Did you see my new outfit?
  • I love you so much!

Next up, we have a video from a guy whose videos I used to watch all the time when I was preparing to visit France and while I was living there. He is from France, but lives in the USA, so his channel used to be called, “Ma vie aux États-Unis.” Now, it seems he’s started vlogging a lot more in English, so he changed his channel name to its English translation: “My life in the United States.” (It doesn’t rhyme anymore but oh well).

I like that he has added full English subtitles to this video. It’s about different types of people on an airplane and how they act. He’s made it humorous and relatable, and after each “type,” he shows a little skit to illustrate his point. I think this would really help with comprehension of the video. I also appreciate how this isn’t explicitly trying to teach language, but students can pick up some new vocabulary nonetheless. However, I do wish there were full French subtitles because I often think using English is a bit of a cop-out with high school students. It’s too easy for them at that level. I suppose what you could do as a teacher is talk about literal translation versus stylistic interpretation. For example, at one point he says “Laisse-moi tranquille!” which he translates below as “Leave me alone!” A literal translation would say “Leave me calm!” But of course, that makes no sense in English!

Another video he made is “Shopping in the USA.” I love this video because it shows a daily activity with key vocabulary words, yet it also demonstrates major cultural differences. Yoann, the Youtuber, is shocked to see that eggs are kept cold. (In France they’re held on a shelf). Moreover, they sell 16 in one container, and they’re white instead of brown! (In France you can buy a teeny tiny container of 6 eggs; it’s very cute). It’s an opportunity to have a conversation about differences between France and North America. We have totally different perspectives on food, and I think we have a lot to learn from French cuisine.

Finally, I just found this video and it made me so happy! I had never encountered this Youtuber before, but she’s a French expatriate living in Montreal. This video was filmed on a trip to Lille, France, where I actually lived during my study abroad. I’m actually jealous because she was there during the Braderie de Lille. It’s a massive flea market and festival which takes place every year during September (and I was never there in September, unfortunately!) This vlog is an open door into exploring a new culture – the north of France. In the video, they eat mussels (the traditional dish of Lille) and of course, drink beer. They explore the wonderful antiques that are on sale throughout the city. This is a great video to show students because of the cultural content and also the amazing visuals.

If I were to show this in a French class, I would incorporate it into some sort of project. I’d ask my students to vlog something, like maybe their makeup routine, or how to change a tire … maybe a cooking tutorial or a trip to a famous landmark nearby. Whatever they’re interested in. They could do a voiceover in French describing what they’re doing, seeing, experiencing, and it would be just like these francophone vloggers.

I realize that this post is getting pretty close to 1000 words, so I think it’s about time to wrap this up. I spent about an hour combing through Youtube and looking for content, and there is just so much available that teachers can use in the classroom and expand into creative, culturally relevant, authentic lessons. I feel inspired now!

Secondhand September

September is almost past us, but before we turn the calendar, I wanted to highlight a movement that has been going on this month on Instagram. The hashtag #secondhandseptember was started by Oxfam, a charity in the UK – currently, there are over 46,000 posts under this hashtag. Oxfam operates a chain of thrift stores, or charity shops as they’re called in the UK. The hashtag emphasizes the importance of purchasing secondhand clothes as opposed to new items. This month, Oxfam encouraged people to take a pledge not to buy any new clothing for the whole month of September.

Over the past few years, there has been a definite shift in the online perception of thrift stores and thrifting. Take a quick look at this information from Google Trends, for example:

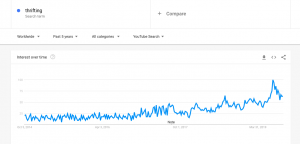
From 2014-2017, the searches for “thrifting” on Youtube remained relatively constant. But since fall 2017 there has been a pronounced rise in searches, including a prominent spike in July. Correct me if I’m wrong, but in my experience, shopping secondhand used to carry quite a negative connotation – it was considered low-class; a sign of poverty. I remember that in the mid to late 2000s, brand names were all the rage. The way to be “cool” was to wear the biggest brand name from the most expensive store (at the time, the trendy brands included Abercrombie & Fitch, Hollister, and slightly cheaper versions such as Aeropostale and American Eagle). When I was quite young, nearly all my clothes were hand-me-downs or thrift store finds, but as I went through middle school and high school, my mom and I would shop exclusively on the sale rack. Therefore, I was sufficiently “cool.”

I believe the shift is largely a reaction against fast fashion. As a teen (this was maybe around 2012) I checked out a book from the library called “Overdressed: The Shockingly High Cost of Cheap Fashion” by Elizabeth Cline. It was quite an eye-opener – I had already been aware of sweatshops and dangerous working conditions, but at the time, I really didn’t know what to do about it. Even today I’m not perfect, and most of the time I can’t afford clothes made in North America or Europe, but I’m trying to do better by thrifting. Anyways, with books like this, and documentaries such as The True Cost (2015), consumers are considering ethical issues more than ever before. To some extent, brands have responded to this by trying to produce clothing more ethically. However, many are rejecting these brands entirely, in favour of shopping secondhand.

Furthermore, consumers are also more conscious of the environmental impact of their shopping. The textile industry is second only to the oil industry in terms of how much pollution it produces. Therefore, a great way to reduce the pollution is to simply buy clothing that has already been made, rather than purchasing brand new clothing and driving the demand for fast fashion. Thrifting is a great way to be more eco-friendly without breaking your budget.

With all that being said, I’ve been actively shopping at thrift shops this whole month and have not bought any brand-new clothing (yay!) I found that you can get a lot of high quality items and well-known brands at thrift stores. Moreover, even though some stores have high prices, they have sales regularly and you can save even more money that way! Let’s check out some of the things I got!

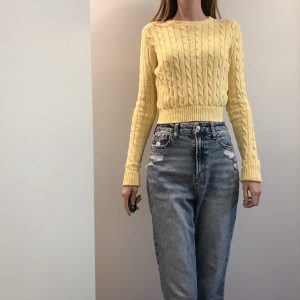
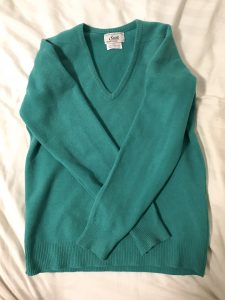
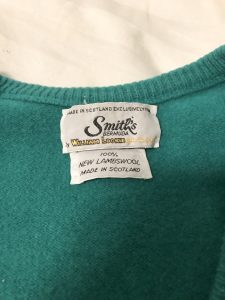
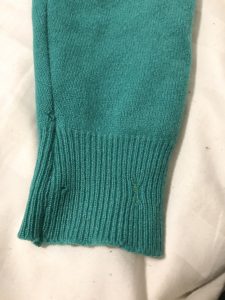
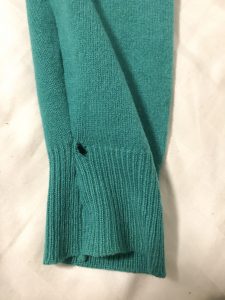
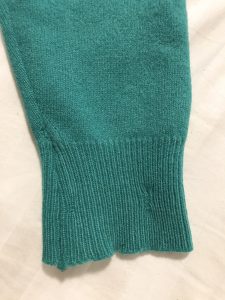
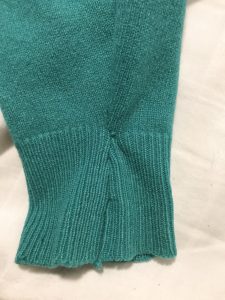
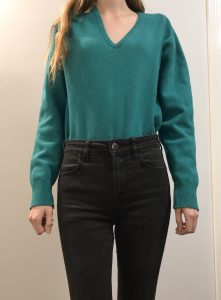
First of all, I bought this sweater on Friday morning at Salvation Army. They were having an amazing sale: blazers, sweaters, shirts, blouses, and pants were all 50% off! Side note: Salvation Army is a non-profit organization, so there isn’t any tax on the clothes. It’s just a plain grey sweater, a bit oversized, soft, and cozy.

Brand: H&M

Price: $5

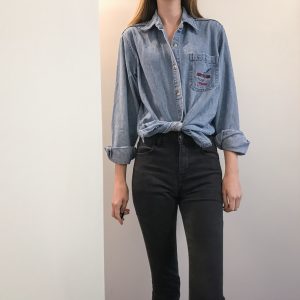
Next, I picked up this denim shirt, also at SA. It says “Hard Rock Café Barcelona” on it, which caught my eye because my dad just took a trip to Barcelona. I like that it looks vintage (I actually think it might be) and it’s 100% cotton. All-natural and comfortable!

Brand: Hard Rock Café

Price: $6

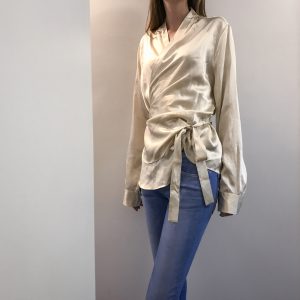
I think this is the item I’m most excited about. When I touched it, I had a good feeling about it – then I checked the tag. 100% silk! I’m pretty sure whoever tagged this item didn’t check what it was made of. Fair enough, most of the time tops like this are 100% polyester. Well, I scored big, and I feel like such a fancy lady when I put this on.

Brand: The Limited

Price: $3.50

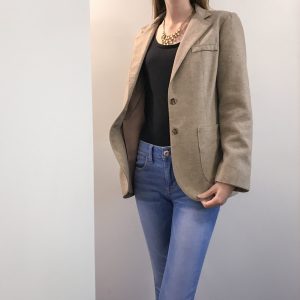
I also got this camel-coloured blazer. I can’t tell if it looks too old for me or not, but I could tell that it was constructed really well. It’s tailored at the waist with vents on the back for mobility, and it’s 25% wool for some added warmth. Maybe this is the beginning of my journey to dress more like a teacher!

Brand: Plum Tree

Price: $6

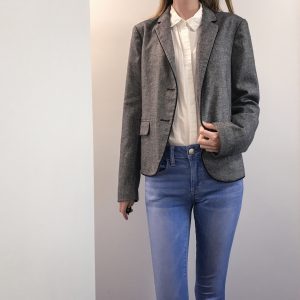
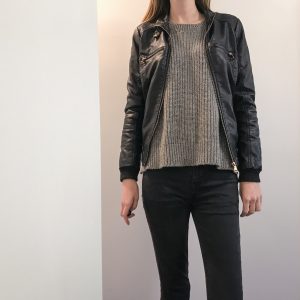
The last thing I picked up at SA was this navy blazer. You can’t see in the picture, but it has navy elbow patches which caught my eye. It’s kind of preppy and I think it’ll be nice for fall.

Brand: The Gap

Price: $6

Earlier this month, there was a bag sale at Beacon Community thrift shop. It’s a tiny store on Pandora, but they said you could fill up a bag for $8.50, so of course I had to go! This isn’t a colour I’d usually wear, but it’s 100% cotton and I just thought it was cute. It reminds me a bit of what Sandy wore in Grease when she was still a goody two shoes.

Brand: Brandy Melville

Price: Approximately $1

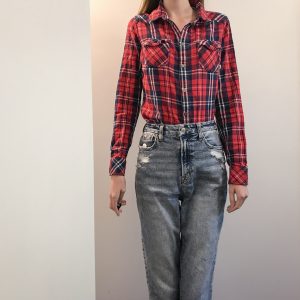
In the bag sale, I also got this plaid flannel shirt. Of course these are a fall classic! It was exactly my size and from a decent brand so I picked it up.

Brand: TNA

Price: Approximately $1

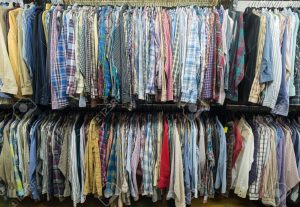
I hope it was fun and interesting to take a look at some gems that I was able to thrift. Thrifting isn’t easy; you have to search through racks of old-lady clothing, as well as old, faded, stretched out, stained, pilled items that are priced at like $10 (why???). You need a fair bit of spare time in order to properly look through all the sections: I recommend at least 30 minutes. More importantly, you need to pay attention to sales and go early in the morning (it really motivates me to get out of bed!). However, there’s absolutely no reason why you can’t dress like a queen when you shop secondhand. You can find popular brands, luxurious fabrics, vintage pieces, and one-of-a-kind items. For anyone concerned about the environment and the ethics of fast fashion, I recommend thrifting – it’s an adventure you won’t regret!

« Older posts

© 2024 Gabrielle Sieben

Theme by Anders NorenUp ↑