Future teacher, lifelong learner

Author: gabriellesieben (Page 1 of 2)

le français est essentiel

Why I’m never going back to fast fashion

I’m 23, so I’ve been young and broke for basically like 10 years now. I thought that I had to go to stores like Forever 21, H&M, and American Eagle to keep up with all the latest trends. Those were, after all, the stores that were affordable for someone like me who liked to buy new things fairly often. I didn’t know what my clothes were made of, and I didn’t care as long as they looked cute and felt comfortable. I kinda knew, in the back of my mind, that the people who made these clothes worked in horrible conditions and weren’t paid fairly for their labour … but I just tried not to think about that.

Well, since I started this inquiry back in September, I’ve purchased one (1) brand-new piece of clothing from a store. I wish it could have been none, but I find it almost impossible to buy pants that fit at the thrift store because most of them are too big. I needed a pair of pants that I could wear to work. Clearly, it’s not always possible to buy everything secondhand, but from now on, I want to keep thrifting the vast majority of my closet.

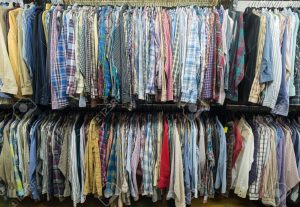
First of all, it’s cheaper than what any fast fashion store can offer. Sweaters are usually $8-10. Jeans are $10-15. Winter coats are around $20-25. But that’s if you don’t go on a sale day! I pay attention to 50% off days which helps me find items I need for crazy good prices. Now, I have 4 or 5 warm winter coats so I can keep from getting bored wearing the same exact coat every day.

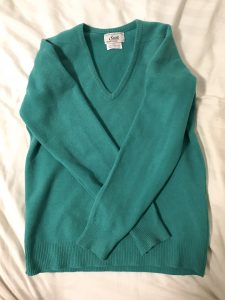
In addition, the items I find at the thrift store are way better quality than what most stores make these days. I know, I know, your grandparents always say that “they don’t make things like they did back in the old days,” but with clothing it’s totally true. The fashion industry has evolved into a neverending cycle of purchase, wear, take a photo, post it to Instagram, forget about it, and throw it out once the trend has died. Many popular influencers never appear in the same outfit twice, which is a disgusting waste of resources. The culture of always preferring to buy something new over reusing something old has led to fashion companies designing clothes that will wear out extremely quickly – clothes just aren’t built to last. We’re making them out of man-made fibres such as polyester and acrylic that are essentially just plastic that will never biodegrade.

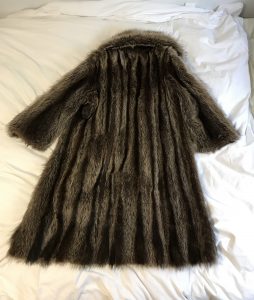
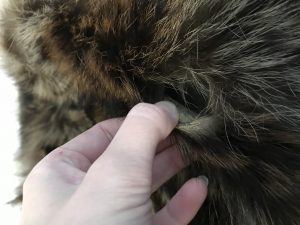
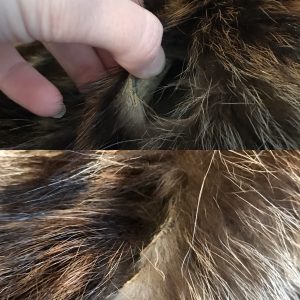
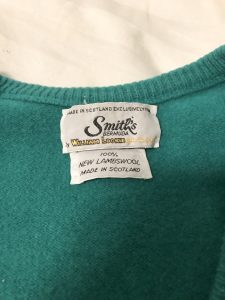
So, I shop at the thrift store, and I buy wool, which traps a lot of heat and keeps me toasty warm in the winter. I buy silk, which drapes so smoothly and beautifully. I buy leather, which is durable and will last a lifetime with proper care. I buy cotton, which breathes beautifully. And yes, I buy fur – I know it’s controversial, but vintage fur means that a new clothing item was not created just for me – I’m simply making use of a garment that already exists and will keep me warm for many winters to come.

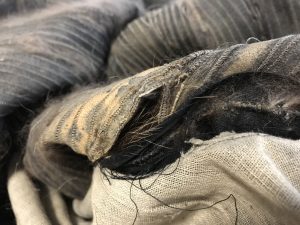
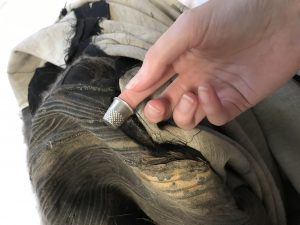
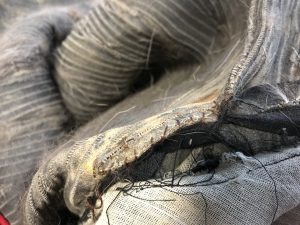
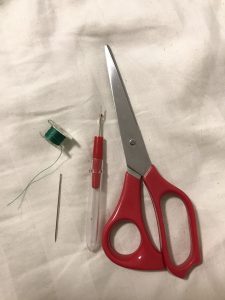
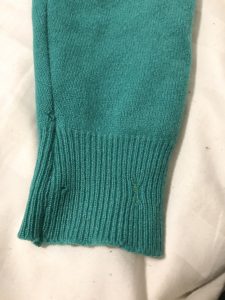
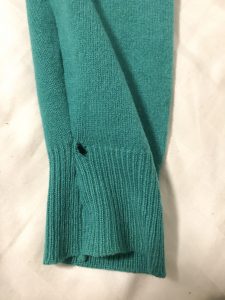
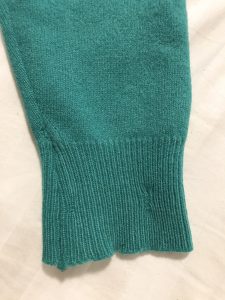
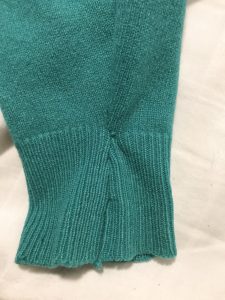
Secondhand items aren’t perfect. I’ve found moth holes in the sleeve of a wool sweater. One of my winter coats has a hole in the pocket and some moth holes at the bottom hem. A recent purchase has a missing button, so I have to look for a similar one to fill the gap. But I know how to fix these small problems, and I can extend the life of a garment instead of purchasing a new one. These clothing items are worth far more than what I paid for them, because they’re made of strong, sturdy, natural materials. They were made to last, and I will make them last.

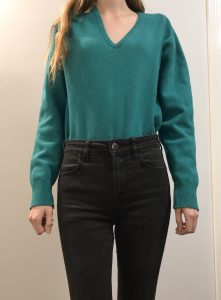
Real fur hat. Real silk scarf. Merino/mohair sweater. All thrifted. The leggings were a hand-me-down too!

In the future, I would like to try reducing even my thrifting purchases. Since there is such an abundance of inexpensive, high-quality clothing, I feel tempted to keep purchasing. It’s the thrill of the hunt when I’m at the thrift store! But I want to make sure that I love everything I own and that I actually wear all my clothes regularly. Otherwise, it sits around and goes to waste when someone else could be enjoying it. So I think I’d like to challenge myself to not buy any clothing for a month. Maybe it will be January. Can I do it? I think I can!

Here’s why language teachers should use Youtube

I’ve talked a lot about using Youtube in the classroom, but I wanted to know what experts have to say. I did some preliminary research, and while there didn’t seem to be a lot out there, I was able to find some good sources. Here are a few themes that I kept seeing:

Immersion 

Jon Watkins and Michael Wilson did some research on ESL instruction in Japan, and they stated that Youtube was the best way to immerse students in their second language without actually travelling to a foreign country. While travel is amazing, it can be inconvenient and very expensive, not to mention nerve-wracking if you don’t really speak the language still. James York, another researcher in Japan, said it can even help language learners to read body language and non-verbal cues. These things are steeped in cultural norms, yet they can be so important for understanding.

Cognition

We all know that “learning styles” are a myth which have been debunked, and although they were actually mentioned in some of the articles I read, it’s still valuable to learn through two modes at once rather than just one. York states that watching videos can help students to visualize word meanings and remember them better.

Motivation

Watkins and Wilson talked about the term “learner autonomy.” It refers to the idea that students should take charge of their own learning. They note that with Youtube, learners have a wide variety of choice in terms of what video content they’re interested in watching. They can watch at home on their own time. York adds that students probably already watch Youtube sometimes in their free time, and therefore have positive associations with Youtube. It’s already something that they enjoy, so bringing it into the classroom will be more engaging and motivating than opening up a textbook. The content is fresh, new, and relevant.

Overall, these are just 3 good reasons to use Youtube videos in the language classroom. It’s backed up by experts, and it’s a valuable resource that shouldn’t be discredited.

Works Cited:

Watkins, J., & Wilkins, M. (2011). Using YouTube in the EFL Classroom. Language Education in Asia, 2(1), 113–119. doi: 10.5746/leia/11/v2/i1/a09/watkins_wilkins

York, J. (2011). Reasons for using YouTube in the language classroom including practical usage examples. Jaltcalljournal7(2), 207–215. Retrieved from https://journal.jaltcall.org/storage/articles/JALTCALL 7-2-207.pdf

Extra English – video in the ELL classroom

I was at Vic High on Wednesday, and I went to the same ELL class that I go to every Wednesday afternoon. It’s a ton of fun – there’s lots of diversity in the room, different grade levels, different skill levels, and students from all over the world. Naturally, this can also lead to some challenges for teachers, but the ELL instructor is experienced and confident. She uses the TPRS style, which keeps students highly engaged and helps them participate in simple, short conversations. She sometimes uses video in her teaching. However, I also wanted to point out how the TOC used video this past Wednesday.

He showed the students a two-part episode from a series called Extra English. It was set in England, and it looked to be produced in the late 90s or early 2000s. Sure, the accent was different, but he mentioned it to the students and I think that could be a good way of helping them adjust to the varied ways people speak English. The strongest part of this clip was that it addressed youth culture. The characters were roommates who used the Internet and tried to get dates. One character was an immigrant from Argentina and didn’t know very much English yet. Sometimes, he misunderstood things, which led to funny situations. It was actually a lot like a sitcom, except that the actors spoke more slowly and clearly. The TOC also addressed this and asked the class if they heard people usually speaking this slowly. I liked that the slow speech made the content more accessible for students, and it was also great for them to recognize the differences between the show and the native speakers they hear every day.

I’m glad he used this resource because now I’ve made a note of it and I potentially might use it in the future. It was the right level of language, and it’s a type of content that’s relevant and interesting to high school students. Furthermore, it was about 20 minutes long, which is awesome for a TOC who probably doesn’t have a lesson plan. It wasn’t just to fill time, because he asked a few questions afterwards and had students write 5 sentences about the TV show.

This is just another great example of video being used in the language classroom.


Minecraft in education

A beautifully pixellated sunset.

On Tuesday, we played Minecraft in class.

I’ve heard my brother babbling enthusiastically about this game for years, so I know a lot of the terminology, but I’ve never actually played it. (I have, however, seen a lot of cringeworthy content such as this viral music video).

The projects that the teacher had her kids do sounded super cool. I didn’t know there was such a thing as Minecraft for Education in a separate platform that can be controlled by the teacher, so that was news to me. I think something like this can really activate student curiosity and creativity. Also, if they are already playing videos games in their free time, they might as well learn something from it! I especially liked the idea of teaching them how to survive and eventually build their own civilization. It helps students to put themselves into the shoes of someone who lived thousands of years ago.

As for the actual gameplay, I’m going to sound like such a boring person here but I really don’t like video games. I hate learning new controls and having to follow instructions in order to complete an objective. Everyone always sucks at a game the first time they try it, and I’m no exception, but I give up pretty quickly. I just made my guy wander around to check out what the scenery looked like – I thought the sunset on all the islands and the ocean was beautiful. After that, it became night and turned into survival mode. I didn’t feel like battling it out with all the creepers so my guy just hung out on top of an island all by himself. He didn’t get hungry or tired or injured. I guess what I’m saying is that my strategy in video games is basically to do nothing.

Kudos to all the teachers using this – I think the majority of kids will enjoy it and learn a lot from it.

A completely amateur seamstress repaired a vintage fur coat – the results will SHOCK you!

Last winter, I trudged mournfully through the snow and the biting wind, wearing the same American Eagle parka every day because it was my only warm coat. Underneath it I had to wear two shirts and a sweater, but I was still freezing my butt off. This winter won’t be like that because I bought a vintage fur coat off Craiglist for $100! It’s from the 1960s or 70s, and it’s made of raccoon.

Here’s the problem: after I took it home I realized there was about a 1.5-inch tear under one of the arms. I wasn’t super freaked out about this because the same thing happened to my mink coat (another vintage piece, from the 1950s). Last time, I was on the mainland and my grandma fixed it for me. I was too scared to try, in case I made a mistake.

This time though, it was up to me to fix it. I’ve been getting more confident with my hand sewing skills, since my machine is still on the blitz. So I gathered some materials.

I chose to use some dark brown embroidery thread: first of all, because it’s thicker and stronger, and second of all, in case any of the thread would show through on the front side. I did split the embroidery thread into two strands though, so that it wouldn’t be super thick.

Here is what the rip looked like. You can see it’s quite long, and vintage fur can become delicate over time. I was worried that it would rip even further.

First, in order to get to the back side of the rip, I had to seam-rip the lining. Now, I could actually open up the coat and sort of turn it inside out so that I had access to the rip.

Here’s what it looked like once I opened it all up. You can see that the rip is right up against the black strip of reinforcement which connects the arm hole to the rest of the coat.

I ended up doing a whip stitch (like my grandma told me to) horizontally across the rip. My needle had to penetrate both sides of the fur, as well as the black reinforcement. That’s a lot of thick layers to sew through, so I needed to use a very old-fashioned tool…

A thimble!!

This saved my finger from literally getting stabbed every single time I needed to push the needle through the material.

In the end, here’s what the seam looked like from the inside. Both sides are tightly stitched together and won’t be able to tear further down.

Here’s a before-after comparison. You can still see the seam a little bit from the outside, but luckily the long hairs cover it up (and it’s underneath the armpit anyway). Obviously, I am not an accomplished furrier!

To finish it off, all I needed to do was re-attach the lining to the black piping at the bottom hem of the coat. It was a really long hem, but I just did a quick whip stitch. This whole process of fixing the coat, from start to finish, took me about 45 minutes.

Overall, I think it would have cost me almost as much as I spent on the coat in the first place in order to get someone to fix it. It also would have been hard to find a furrier, because the fur industry is kind of dying. In a sense, it makes me feel even happier to have the coat because it feels like a relic of a bygone era. It’s very satisfying to take something old and broken and give it life again. I probably said the same things when I wrote about mending that wool sweater, but it just feels wholesome when you take the time to fix things. Now, when I wear this coat in the winter, I can feel proud that I played a role in its journey.

EdCamp is a pretty cool idea

So almost a week ago we learned about something called EdCamp, and then we got to test it ourselves. Most professionals, myself included, kind of roll our eyes when we think about going to a conference. At least in my case, I’d much rather spend a weekend relaxing at home or out exploring rather than sitting around listening to someone talk about something boring. But EdCamp is a place where you can pick what you’re interested in and discuss that topic as a group. There’s not really one expert who speaks the whole time and then answers a few questions. Everyone gets to ask questions and then suggest some potential answers.

I liked this format because there was a chance to vote on topics that we found interesting, and when we divided into groups, there was an opportunity to share our own experiences. I chose to go to the topic “keeping hands busy during class” and talked about how that is a constant problem in my tutoring job right now. (My erasers always end up destroyed and crushed into bits). I was able to listen to some suggestions my classmates offered and I heard how they have had similar experiences.

All in all, it was a helpful experience, and gave me some ideas that I might try. I’d probably go to an EdCamp conference if it was in Victoria.

Youtube for learning

This morning, I was doing some more research on my EdTech inquiry project. I wanted to know how teachers are already using Youtube in schools. Well, I came across a section of Youtube that I’d never seen before! I guess to most people this is old news, but did you know Youtube has a section just for education? Here’s what it looks like:

Scrolling down further, I found sections about fear and psychology:

I love that Youtube is highlighting creators who make educational content and separating it out from other content. The article I read said that they specifically tried to filter educational content from distracting videos and potentially offensive content. They also turned off the recommended section so that students won’t just keep clicking and accidentally watch for longer than they intended. I’m sure everyone has had that experience where they’ve gone down a rabbithole and just kept watching entertaining videos for like an hour (or more)…

Another article talks about how students use Youtube on their own time. A survey conducted with German students found that 50% of them watch educational content, including concepts they were stuck on, information they needed to review, and tutorials such as music, art, and drama lessons. I just think it’s so awesome that students who are really curious can learn basically anything they want to know in about 15 minutes on Youtube. If students are already using these resources, then it’s so important for teachers to take advantage of that. Maybe we can curate playlists of suggested content, such as specific math concepts that they can look at if they get stuck while doing homework. For an English or French class, a teacher could ask students to watch a video at home for homework, and then discuss it the next day in class.

The content on Youtube is infinite, so the possibilities are endless!

Mending: a forgotten skill

I have literally never felt like such a domestic goddess before.

I went to work. I came home. Did all the dishes. Did some homework. And then I finally got around to a task I’d been meaning to work on for two weeks: mending! I actually fixed something that was broken! It’s so satisfying. Everyone should know how to mend.

First of all, here are the materials I used:

Scissors to cut the thread, a needle, a seam-ripper, and somehow I randomly had the EXACT same colour thread as the sweater. So that was unexpectedly cool.

Here’s what I had to work with:

It’s not my usual colour, but it was $5 for 100% lambswool. Made in Scotland. How could I resist?

The sleeves, however, were not looking so hot. Do moths actually eat wool or is that a thing of the past? Because it looks like moths have been munching on this sweater…

Sleeve #1 may not look too bad at first glance. It only has a couple tiny holes. Until you notice that its previous owner had done quite an awful mending job with a mismatched bright green thread. They didn’t do an invisible stitch either, so the thread is clearly visible. Luckily my grandma taught me how to do an invisible stitch when I was a kid, so I remember how to do it. Sleeve #2 is obviously in pretty bad shape too.

I started by twisting the thread around my finger a few times and then rolling it off with my finger and thumb to make a knot. Not sure if that makes any sense at all, but it’s basically a way easier method than squinting and trying to tie a teeny tiny knot. I started from the inside of the sleeve so that my knot, and any thread tail, would be hidden. Then, I did an invisible ladder stitch. I found a tutorial on Youtube that shows you how to do it.

I did this stitch on both sides of the holes and tightened the stitches, bringing both sides of the fabric close together and successfully closing up the hole. Let’s see how it turned out.

Now, sleeve #1 looks much better. My stitching is hidden, but even if a tiny bit of it shows, it’s a matching colour! Sleeve #2 looks a tiny bit wonky because the hole I had to close up was very large. Now there’s a slight gather that appeared when I pulled the two sides of fabric closer together. That’s okay. It’s better than having a big hole in the sleeve!

Tonight I transformed something worn-out into something wearable. I think that’s a win for sustainability and slow fashion! Now I just have to wash it. I was too scared before in case the holes would get even bigger, but this sweater smells like old lady perfume. Don’t worry, I won’t put it in the dryer!!

Thrifting 101

I haven’t bought any brand-new clothing since the summer because I took the Secondhand September challenge. Since then, I’ve learned a few things about thrifting and developed some strategies to be successful. I wanted to share them in a post in order to make thrift shopping more accessible for everyone! (Also, I’m taking a break before I get back to studying and writing papers).

Tip #1: Go to the right thrift store!

If you’re new to thrifting, you should check out several different stores in your area, but not all thrift shops are equal. I have a few personal favourites. The closest one to my house is the Salvation Army at Cedar Hill Cross. Not only is its location ideal, but they have regular sales (every other Friday, they have some kind of 50% off deal). On regular days, you could spend $10 on a sweater or top, but I prefer to get them for $5 of course! Even more awesome is the fact that there is no sales tax – Salvation Army is a non-profit organization. When you buy from them, the money goes right back into the community to feed, clothe, and shelter people who are in need. Another great organization is Women in Need, or WIN, which is located downtown on Pandora Avenue. They specifically support women in the community. You can often find great brands downtown as well!

I used to go to Value Village quite often when I lived in Abbotsford, but I find that the one in Victoria can be quite overpriced. Tops can be $12-20 depending on the brand, and they rarely have good sales. They are a for-profit organization so naturally they charge more; plus you’ll be paying sales tax.

Tip #2: Look in all the sections. 

I don’t mean literally all the sections. But say you’re usually a size small in tops. Go through all the sizes! Items that end up in the thrift store are often marked incorrectly, put back on the wrong rack, or you can just go for the oversized look which is so popular right now. If you’re a larger size, don’t be afraid to skim through all the racks because things can definitely be misplaced. Another place you can look is the men’s section. I find so many soft cotton flannels – some that I bought for my husband, and one or two that I kept for myself! To be honest, these tips kind of only apply to tops, because so far I have been shockingly unsuccessful at thrifting pants. I wear an uncommon size and so far haven’t had any luck finding it. However, I have heard that you can sometimes find vintage Levi’s in the men’s section, so if they fit you, definitely give that a try!

Tip #3: Look for natural fibres. 

I never used to care what my clothes were made of; only how they looked. But last winter I pretty much froze my butt off every single morning when I walked to the bus stop in -10 weather at 6 AM. That made me realize that polyester and acrylic simply aren’t warmenough for winter! I have had amazing luck thrifting outerwear – most notably, a coat made in Italy that’s 80% wool, and another one made in Poland that is 55% wool. Both of these will be so much warmer than the one I got off the sale rack at Guess. And, they were both right around $12 (I love those 50% off sales). More recently, I picked up a 100% lambswool sweater made in Scotland, a 100% silk blouse ($3.50), and a black turtleneck with a nylon/polyester/merino blend. It doesn’t have to be 100% natural to be good. Even if you have some wool content, it will keep you MUCH warmer than synthetic fibres. Also, this is stuff that I’d never be able to afford brand-new. A wool sweater would be over $100 and a silk shirt would be at least $50!

Tip #4: Check the items REALLY carefully (and don’t be afraid to ask for a discount). 

I’m guilty of not following the first part of this rule. When it’s the sale day, I don’t care that much if the item isn’t perfect, because I can get out tiny stains or stitch up tiny holes. But if it’s a full-price item, then I’ll ask for a discount. They’ve been really good about that at Salvation Army – I got some black leather ankle boots that were scratched, and they gave me about 30% off (originally $15 down to $10). Definitely inspect as carefully as possible, especially if you aren’t willing or able to fix the item. If the jeans have a big rip in the crotch or the white shirt has gross pit stains, it’s better for that item to just get recycled. (That’s what thrift stores do with the clothing they can’t sell).

Tip #5: Get out of your comfort zone. 

The best thing about thrifting is that you can find totally unique items that no one else has. You can put those items together in all sorts of creative ways. Sure, some of those items are butt-ugly, but that’s why you have to go on a treasure hunt. Try on some stuff that you’ve never tried before and see if it looks good on you! Maybe you would have never considered buying an item at full price, but then you try it on and end up loving it. Skim the racks with your eyes and see what jumps out at you: prints, patterns, fabrics, details… this is an opportunity to develop your personal style.

Those are my top 5 tips, but above all, make sure to leave yourself enough time so that you can be relaxed, try stuff on, and most importantly have fun! Thrifting is a good habit for so many reasons. You can minimize your carbon footprint while saving money and finding unique items all at the same time! I highly recommend thrift shopping and I hope these tips were helpful! If you have any questions, leave them in the comments section.

Finally finished my giant yellow scarf!

I’ve been pretty swamped with homework and assignments since last week, which is why I haven’t posted here in awhile. However, I procrastinated by knitting for a few hours on Saturday because I was almost finished my scarf! I finally completed it after finishing my 6th ball of yarn. This scarf cost me about $35 in materials, and it is made from nearly 600 metres of yarn. I was getting really nervous while casting off because I ALMOST didn’t have enough yarn left. I ended up with only about two inches extra!

Anyways, I have to go back to writing a paper, but I’m happy that I managed to create something cozy, warm, and functional.

« Older posts

© 2024 Gabrielle Sieben

Theme by Anders NorenUp ↑